How to Configure your Omada EAP into a Mesh Network Using the Omada App

EAP615-Wall , EAP683 UR , EAP660 HD , EAP625-Outdoor HD , EAP245( V3 ) , EAP673 , EAP650 , EAP683 LR , EAP265 HD , EAP670 , EAP680 , EAP620 HD , EAP613 , EAP610 , EAP225( V5 ) , EAP653 , EAP623-Outdoor HD , EAP650-Wall , Omada Software Controller , EAP610-Outdoor , EAP650-Outdoor , EAP655-Wall
Recent updates may have expanded access to feature(s) discussed in this FAQ. Visit your product's support page, select the correct hardware version for your device, and check either the Datasheet or the firmware section for the latest improvements added to your product. Please note that product availability varies by region, and certain models may not be available in your region.
*Required Omada app version 4.6.9 and above
Starting with V4.6.9 of the Omada APP a user is able to configure their Omada EAPs into a unified mesh network, without the need for a controller or controller software. A mesh network allows all of your associated APs to broadcast the same SSID across the whole network allowing a seamless transition between APs.
The following figure shows an example of the Omada mesh network. As with OneMesh for home networking it is suggested to have no more than 2 hops in any direction. More than two hops and network performance might be noticeably decreased.
*Note: Mesh networking may require a firmware update. Please check with TP-Link support or check the firmware release notes of your AP to confirm whether your device has compatible firmware. Download Center | TP-Link
How to Configure:
Step 1. Install Omada APP on your phone.
You will need the Omada APP to configure the EAP mesh network. You can get it from Play Store (Android) or APP Store (iOS). Make sure you have V4.6.9 or higher of the Omada APP installed before continuing.
Step 2. Deploy the EAPs in proper positions.
Plan your network and deploy your APs. Plan your network deployment to make sure the satellite AP receive a good signal from the root(main) AP. A poor signal will dimmish network performance.
*Note: Your Omada EAPs should be set to factory default settings. If your EAP is configured please reset the device(s) before continuing.
Step 3. Create the mesh network using Omada APP.
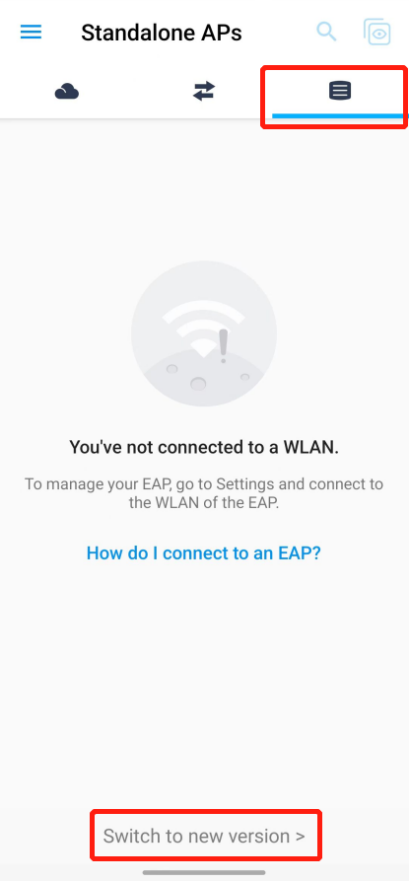
Open Omada APP and go to the APs Management page. Then tap on Switch to new version
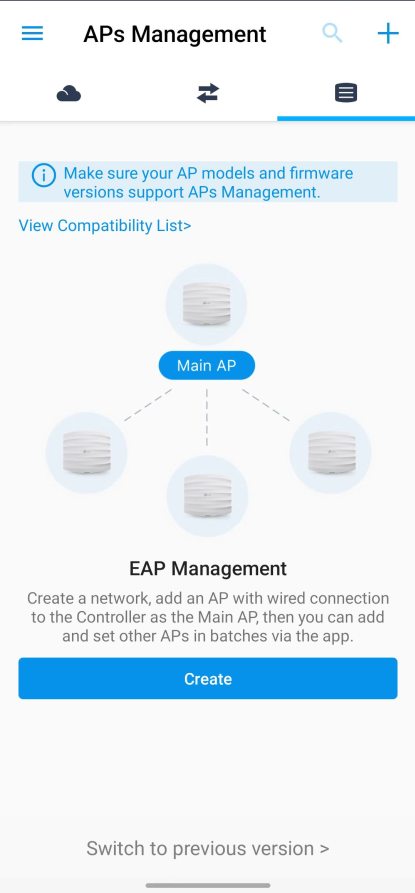
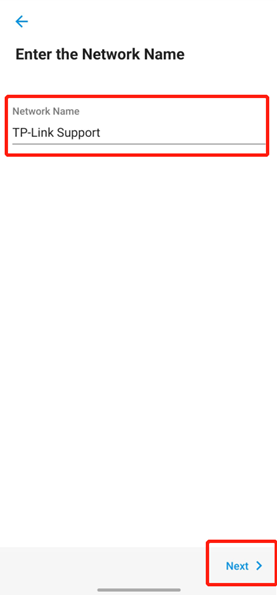
Tap Create, then configure the Network Name, then tap Next.
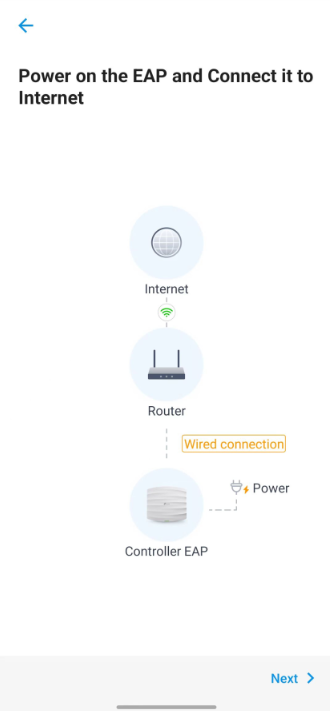
Follow the on-screen guide, and make sure the APs are powered on, and connected to the default SSID of the one that you want it to act as the root(main) AP.
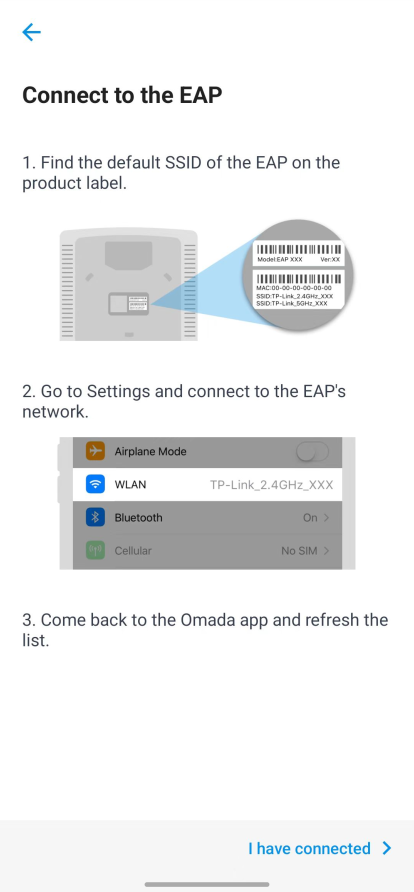
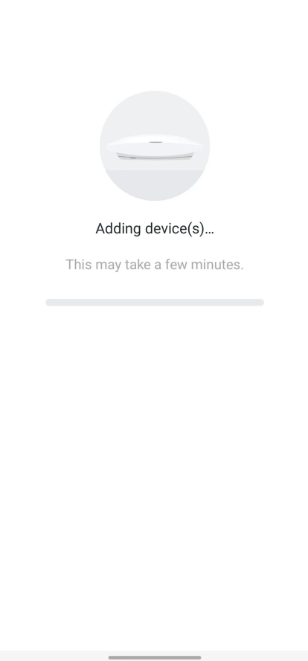
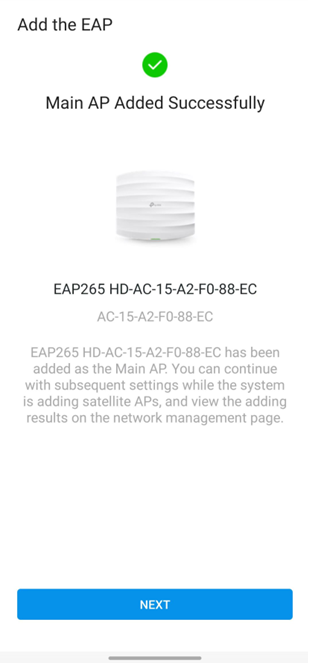
After connecting to the SSID, tap I have connected. There will be a short discovery phase. After that, the list of scanned APs will be shown. Select the APs you want to include in the mesh network and Tap Add Selected AP. Wait until it finishes adding the APs.
Click Next after it is done.
Then, configure the device’s username/password.
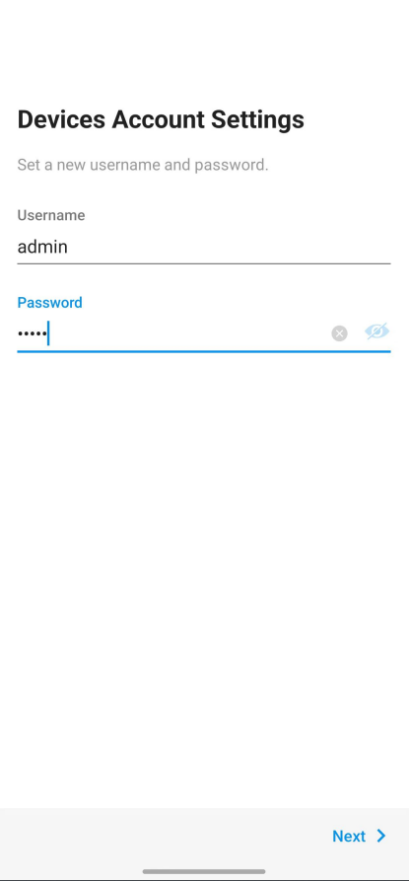
After that, tap Next and configure the SSID/password.
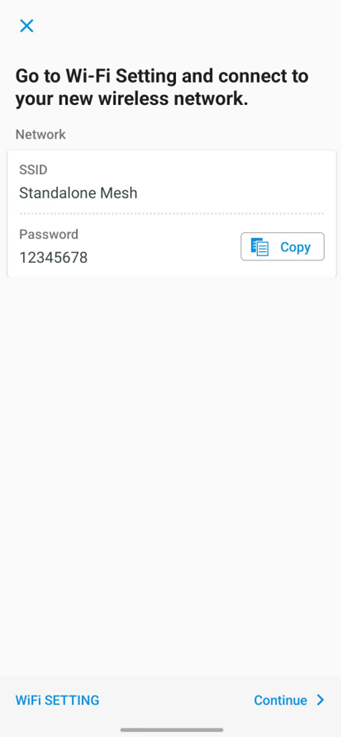
Tap Continue, and you are all set.
Note: You need to reconnect to the new SSID after configuring.
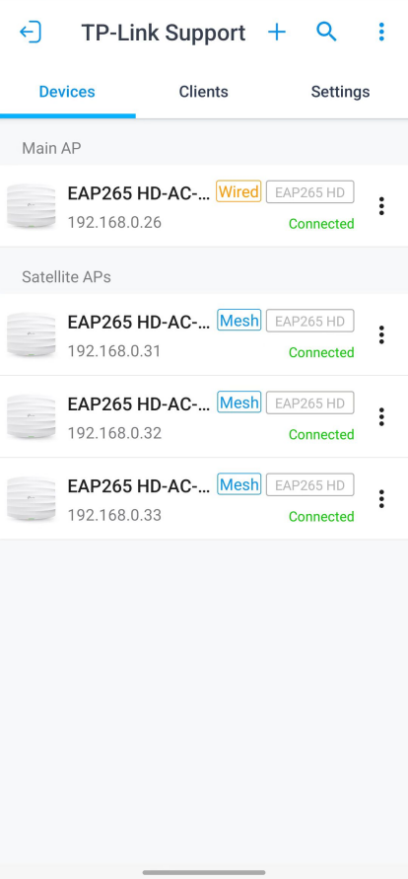
Step 4. Manage your mesh network.
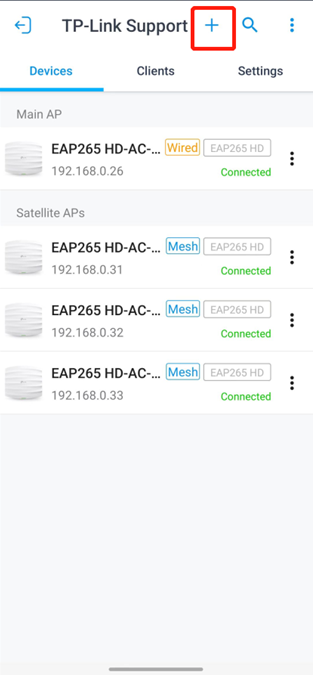
You can add more APs in the mesh network by tapping the +.
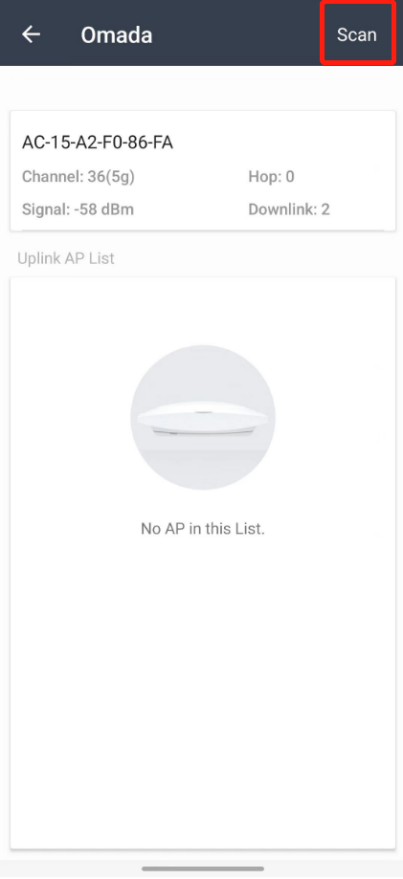
You can change one’s uplink AP by Tapping on that AP.
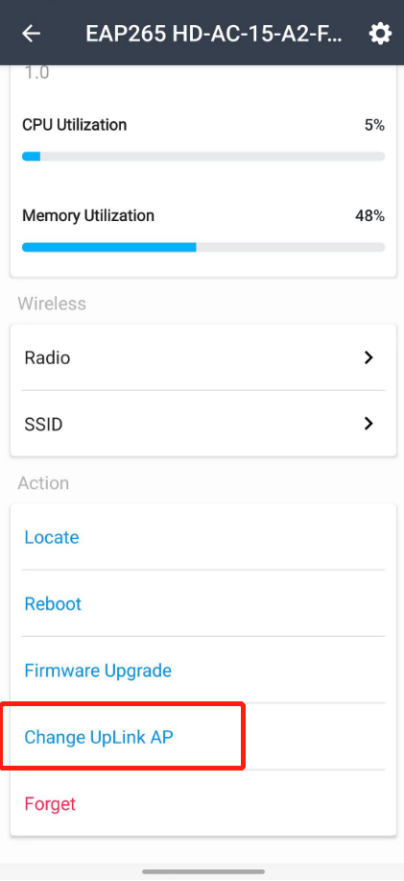
Tap Scan for available uplinks.
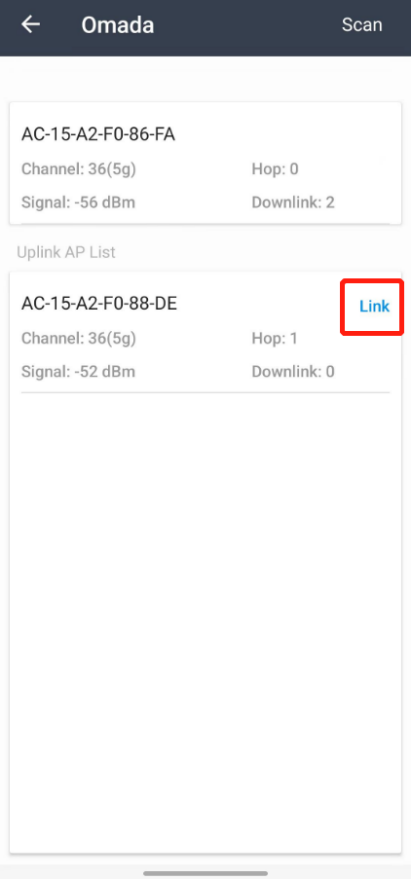
Click Link to link to another uplink AP.
Related FAQs
Looking for More
Is this faq useful?
Your feedback helps improve this site.
What’s your concern with this article?
- Dissatisfied with product
- Too Complicated
- Confusing Title
- Does not apply to me
- Too Vague
- Other
Thank you
We appreciate your feedback.
Click here to contact TP-Link technical support.

TP-Link Community
Still need help? Search for answers, ask questions, and get help from TP-Link experts and other users around the world.
This website uses cookies to improve website navigation, analyze online activities and have the best possible user experience on our website. You can object to the use of cookies at any time. You can find more information in our privacy policy . Don’t show again
Basic Cookies
These cookies are necessary for the website to function and cannot be deactivated in your systems.
TP-Link
SESSION, JSESSIONID, accepted_local_switcher, tp_privacy_base, tp_privacy_marketing, tp_smb-select-product_scence, tp_smb-select-product_scenceSimple, tp_smb-select-product_userChoice, tp_smb-select-product_userChoiceSimple, tp_smb-select-product_userInfo, tp_smb-select-product_userInfoSimple, tp_top-banner, tp_popup-bottom, tp_popup-center, tp_popup-right-middle, tp_popup-right-bottom, tp_productCategoryType
Youtube
id, VISITOR_INFO1_LIVE, LOGIN_INFO, SIDCC, SAPISID, APISID, SSID, SID, YSC, __Secure-1PSID, __Secure-1PAPISID, __Secure-1PSIDCC, __Secure-3PSID, __Secure-3PAPISID, __Secure-3PSIDCC, 1P_JAR, AEC, NID, OTZ
Zendesk
OptanonConsent, __cf_bm, __cfruid, _cfuvid, _help_center_session, _pendo___sg__.<container-id>, _pendo_meta.<container-id>, _pendo_visitorId.<container-id>, _zendesk_authenticated, _zendesk_cookie, _zendesk_session, _zendesk_shared_session, ajs_anonymous_id, cf_clearance
Analysis and Marketing Cookies
Analysis cookies enable us to analyze your activities on our website in order to improve and adapt the functionality of our website.
The marketing cookies can be set through our website by our advertising partners in order to create a profile of your interests and to show you relevant advertisements on other websites.
Google Analytics & Google Tag Manager
_gid, _ga_<container-id>, _ga, _gat_gtag_<container-id>
Google Ads & DoubleClick
test_cookie, _gcl_au